")
In a nutshell
- The three-point lighting setup is the Swiss Army knife of lighting and can be used in almost all situations.
- Three-point lighting consists of a key light, a fill light and a back light.
- If you’re shooting more than one person, the three-point lighting setup can still work.
Next to high-quality audio, the second most important aspect of producing amazing video images is using a professional lighting setup. Sadly, many videographers find setting up professional lighting to be daunting. But don’t fear; by using the concepts below, you’ll be lighting your shots like a Hollywood lighting director in no time. Let’s get started so we can shed some light on lighting for video interviews.
But first, let’s think about light for a moment, or rather, shadows. We’ve found that less is always more when it comes to lighting setups. With every light you add to a scene, you get additional shadows. So, the more lights you add, the more shadows you get. If shadows are what you want in your scene, then this is great. If you don’t want shadows, then you must consider that shadow and light are always interconnected, and as such, you need to think of both every time you put up a lighting instrument.
Three-point lighting setup for interviews
If you take anything away from this article, remember that the three-point lighting setup is the Swiss Army knife of lighting and can be used in almost all situations. So, start with a three-point lighting setup first and then go from there. Many times, three-point lighting will fulfill your needs nicely.
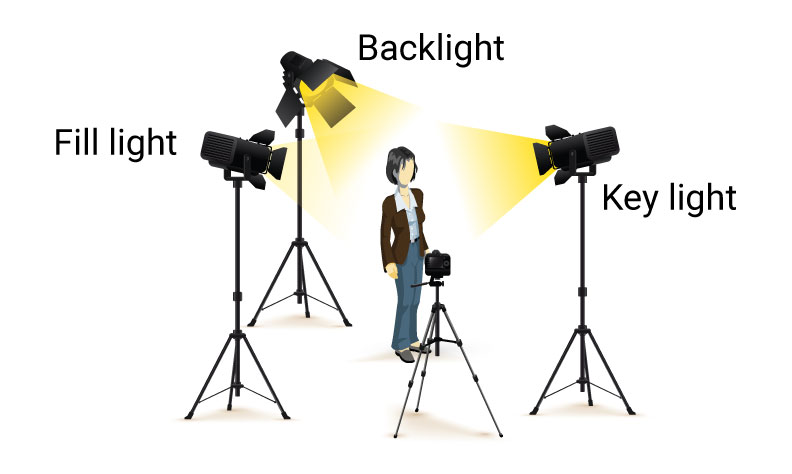
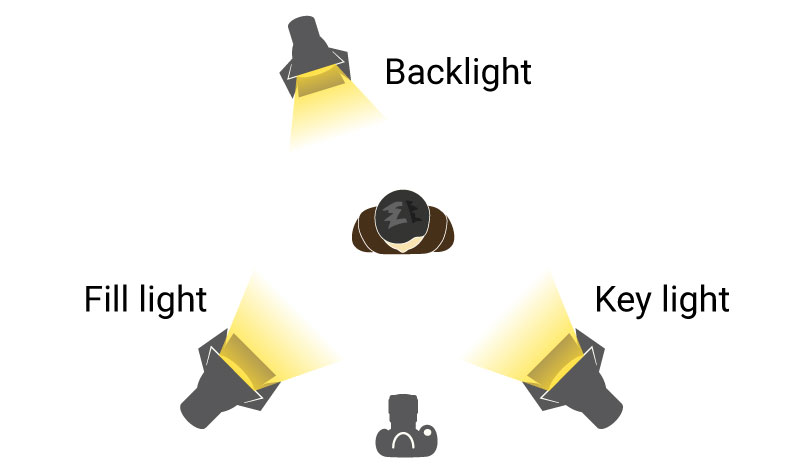
What exactly is a three-point lighting setup? This setup contains three lights: a key light, a fill light, and a back light. Repeat after me: “Key, Fill, Back,” and commit it to your video production memory.
Let’s say we’re shooting an interview with a single person. The key light, which is the brightest light, will go in front of the subject at slightly above eye level and at a 45-degree angle from the camera. The fill light, which is dimmer than the key light, will go in front of the subject, slightly above eye level and at the opposite 45-degree angle from the camera. Finally, the back light, or hair light, goes behind the subject and higher than the subject. The backlight creates a lighting rim or outline around the subject’s hair, separating or “popping” the subject away from the background. Female and light-haired subjects often get a stronger back light, and male and dark-haired subjects get a dimmer one, but it depends on the desired look and how it appears on the camera.
Key light with a reflector and background light (practical or production lights)
Another great setup that we use a lot is a key light with a reflector acting as a fill light. This is a good time to discuss an important concept of lighting. The concept is that the angle of incidence always equals the angle of reflection. If you bounce a light into a reflector at a 45-degree angle, the reflected light will travel away from the reflector at the opposite 45-degree angle. If you only want the reflected light to hit your talent and not your background, then you’ll need to decrease the reflection angle of the light source until it’s off your background.
Some lighting directors prefer this setup over having an instrument for both the key and fill since they say the reflected fill light looks more natural. The cheapest reflector you can use is a large piece of foam core board, but if you want to get fancy, you can buy spring-loaded reflectors that are relatively inexpensive and easy to travel with. The third element in this setup is a background light, which can be a production light or a practical light. A practical light is any light such as a house lamp, desk light or even a flashlight. This light source is used to illuminate the background of the scene and not the talent.
To recap, this setup has one key light, and the fill light is reflected light from the key light. The background light is either a production light or a practical light from the set.

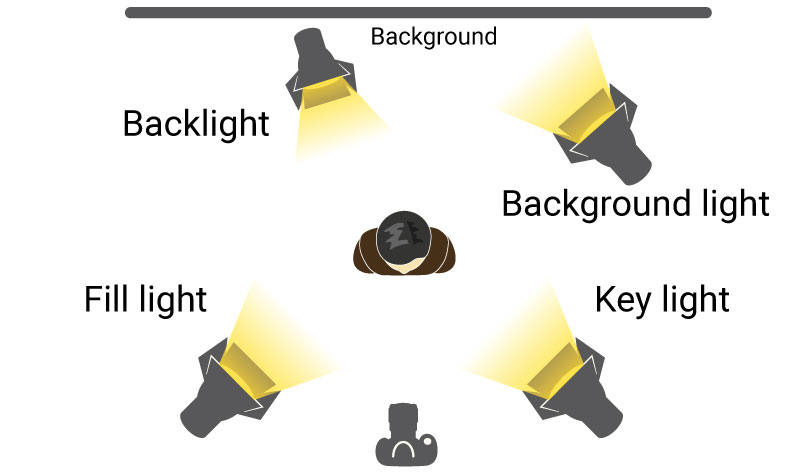
Three-point lighting setup with a background
Up to now, we’ve tried to stick to three light sources for these setups, but this popular setup adds a fourth light to illuminate just the background of the scene. This background light can be left white, or you can add colored gels for a moody effect. Cookies, which are lighting cutouts often shaped like leaves or a corporate logo, and flags work well to adjust these lights to suit the mood and feel of your video. You can also use natural or practical lighting in the background, such as a window or a lamp. Have fun with this setup and experiment a bit to see what works with your vision.
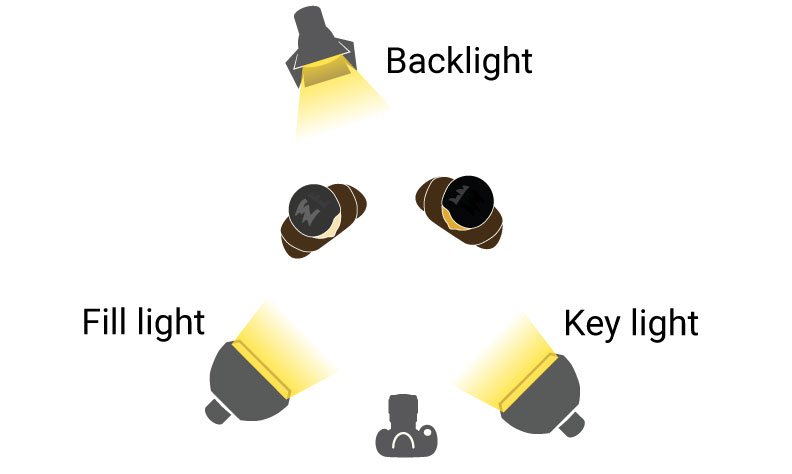
For two people: Three-point lighting setup can still work
Now that we’ve mastered three-point lighting, what do you do if you have to add a second interviewee? Don’t panic; you can use the key light that you already have for subject one as a fill light for subject two, and vice versa for the key light for subject two. Remember, the light is already there, so why not use it?
In this instance, you need to add an additional large, soft fill light source in front of both subjects. This fill can be a reflector or a really diffuse light source like a softbox light. These lights act to fill and shorten the remaining shadows so the scene looks more evenly lit. This setup will take more time and tweaking, so allow for extra time in your production schedule to check this and all your lighting setups in the camera before hitting record. Remember: Your lighting setup may look good to your eye but still be wrong for your camera. Your camera’s image must be what you use to make your final lighting decisions because that is what’s ultimately getting recorded.
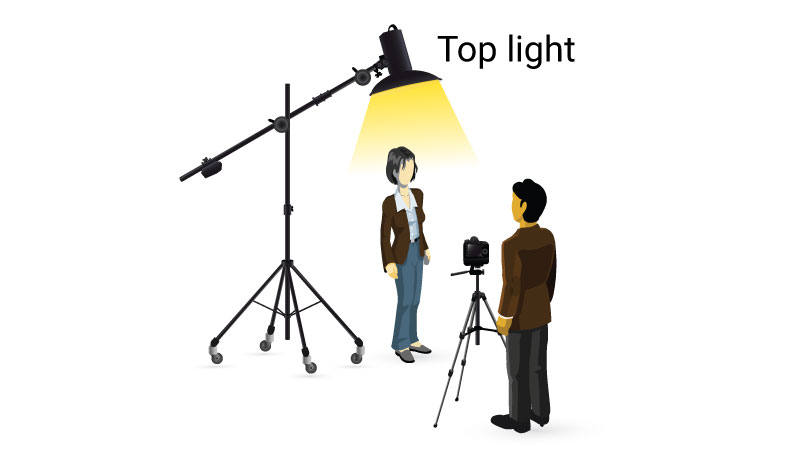
Top light setup
If you’re looking for a totally different aesthetic, try a top-lighting setup. This configuration involves positioning a light directly above the subject and facing downward, which creates deep facial shadows and a more ominous tone. However, safety is paramount with this setup, so use a large C-stand with an extension or Gobo arm, and sandbags to prevent it from tipping over. Ensure that one of the C-stand’s legs aligns with the extension arm for added stability, and place three sandbags, one on each leg.
Light the way forward
Lighting can be a powerful storytelling tool in your video production arsenal. Consider this: A flashing white light indicates a storm outside, while a flickering orange light conveys a campfire. These examples, among many others, can convey a story all on their own. So make use of light and all it can illuminate in your production, and you’ll never be left in the dark.


