Since its introduction in 2018, ProRes RAW has become one of the leading file format standards for recording digital video. Some even say ProRes RAW is the go-to professional standard. Developed by Apple, this format offers a seamless way to work with RAW data directly from the camera sensor. It allows for efficient importing, editing, and grading of video without slowing down the editing process. ProRes RAW also provides ample flexibility for adjusting the visual appearance of your video, enhancing aspects like brightness and shadows to achieve the look you desire.
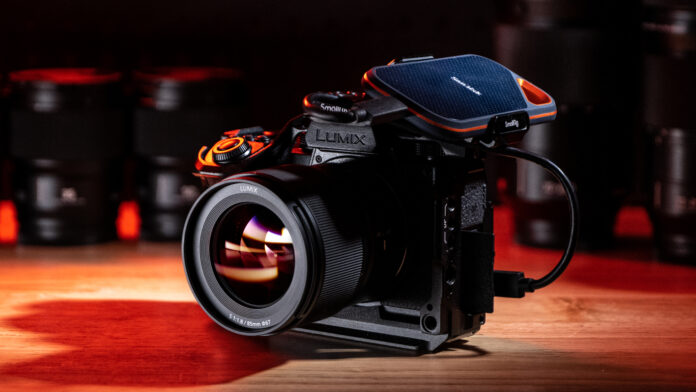
As ProRes RAW becomes more popular, it’s essential for professional-level cameras to support it. Cameras such as the Panasonic LUMIX S5IIX offer support for ProRes RAW recording over HDMI, while the S5IIX’s predecessor, the Panasonic LUMIX S5II, can record ProRes RAW over HDMI via a paid firmware upgrade. Both these cameras enable users to capitalize on the benefits of ProRes RAW. Let’s examine how ProRes RAW can boost your production process and how the LUMIX S5IIX and LUMIX S5II implement this versatile file format.
Understanding ProRes RAW
What are CODECs?
Before we explore the inner workings of ProRes RAW, let’s first talk about CODECs. The term CODEC, an acronym for compression-decompression, refers to the process of compressing and then decompressing data. Digital video files can be pretty large, so CODECs help shrink video file sizes during both the recording and transferring stages, making the files much more manageable. Of course, there also has to be a way to unshrink that data, which is where decompression comes into play. If you’ve worked with video files before, you’ve likely come across some common CODEC types, such as H.264, H.265 and ProRes.
While CODECs can help you keep your video file sizes in check, the decompression process might affect playback smoothness and editing efficiency. But the industry found a solution. As processors became faster and memory storage capacity grew, it became possible to record video without any compression. Suddenly, it was feasible to record exactly what was captured on the video sensor without things like white balance, exposure or any fine-tuning being baked in. This process is known as RAW recording.
Why record RAW?
So, why are professionals shooting RAW? It’s simple: more control over the final picture quality. Any setting the camera can control can be adjusted and fine-tuned after the video’s recorded.
But, as you might guess, RAW files can be massive. An uncompressed video file might be double or even triple the size of a compressed one. Think about how large an hour-long RAW recording would be and the storage space it would need for editing. RAW files require post-production processing. You can’t just download your footage and post a few clips on your website. You have to know your way around noise cancellation and color correction to make your image look its best. One solution is a camera with dual card slots that can record simultaneously; one recording is a RAW file and the other a compressed, ready-to-go format. Or you might use an external recorder that handles the RAW file while the camera records a compressed file internally.
Even with the enormous benefits of shooting RAW, handling the files can be challenging if you don’t have the right setup.
ProRes RAW
Enter Apple’s ProRes RAW, which combines the best aspects of CODECs and RAW. This compression method maintains all the advantages of shooting RAW, while still allowing for some memory-saving compression. The outcome is a more manageable video file that retains all the detail and texture you’d find with RAW files. You still have flexibility in post-production for grading and color correction, too. And ProRes RAW makes for an overall faster workflow thanks to better decompression. When you store a clip in the ProRes RAW format instead of a proprietary camera RAW format, you gain greater control over image processing. This includes tasks like demosaicing, converting linear to log, and applying custom LUTs.
ProRes RAW can scale to fit a variety of needs, whether it’s online streaming or high-end production. Most major editing platforms, such as Final Cut Pro and Adobe Premiere Pro, natively support it. In the past, certain CODECs and RAW formats needed conversion before you could import them into editing apps. ProRes RAW requires no conversion from camera to platform, which makes for a more streamlined post-production workflow. This includes a standardized format for collaborative projects. Many professionals consider the format essential, so cameras like the LUMIX S5IIX are adopting the feature.
LUMIX S5IIX and LUMIX S5II: ProRes RAW capabilities
For those seeking ProRes capture in a budget-friendly and feature-rich mirrorless camera, the LUMIX S5IIX has much to offer. The LUMIX S5IIX also offers a broader range of ProRes RAW capabilities. Supported resolutions reach up to 5.8K, with All-Intra compression. The S5IIX additionally provides bit depth and chroma subsampling and includes advanced features such as RAW video output and ProRes recording over HDMI. The S5IIX can record 12-bit 6K video via HDMI to an Atomos recorder.
LUMIX S5II
At its base, the LUMIX S5II does not offer ProRes RAW capabilities. However, with the paid Optional License Upgrade, you can unlock ProRes RAW recording over HDMI on the S5II. With the firmware upgrade, you get all the ProRes RAW over HDMI capabilities you get with the LUMIX S5IIX. This includes 10-bit depth and 4:2:2 chroma subsampling, allowing the LUMIX S5II to record RAW video with rich color and tons of detail. At the same time, LUMIX S5II users enjoy all the perks of working with ProRes files, such as more creative flexibility in post-production and manageable file sizes throughout the production workflow.
Setting up ProRes RAW on the LUMIX S5IIX and LUMIX S5II
Setting up ProRes RAW on the LUMIX S5IIX and LUMIX S5II takes no time at all. Simply press the Menu/Set button on the back of the camera. Press the down arrow to the video mode, then press right. This opens all the video controls, and it’s here you can find an amazing level of control over your camera. Next, scroll down to the image format page. It looks like a piece of film. Press right again on the Rec. Image Format page and scroll down to find ProRes RAW and press right. Also, from the Image Format screen, you can scroll down to HDMI RAW Data Output and turn that on when you need to output to a different device.
Unlocking the potential of ProRes RAW with the LUMIX S5IIX and LUMIX S5II
If you’re striving for professional-level videos, cameras capable of recording ProRes RAW, like the LUMIX S5IIX and LUMIX S5II, can ensure your videos meet today’s industry standards. Not only do you get professional-looking footage, but you also give yourself more flexibility in post-production. You also keep your system running smoothly throughout the entire project.
ProRes RAW ensures top quality and flexibility for your video recordings. With cameras like the LUMIX S5IIX and LUMIX S5II that are built to support ProRes RAW, videographers can harness the power of RAW while maintaining an efficient workflow. To learn more about the LUMIX S5IIX and LUMIX S5II, visit panasonic.com.


