")
In a nutshell
- Using keyboard shortcuts, you can perform video editing tasks with just a few key presses, eliminating the need for time-consuming mouse clicks or menu navigation. This efficiency allows you to focus more on the creative aspects of editing and less on the technicalities.
- Being well-versed in your software will enhance your overall speed and productivity in the editing process. Different software may have unique ways of achieving similar actions, so knowing the location of essential features is crucial for efficient editing.
- Tools like music and storyboarding gives you style and structure to your edits so you can enhance the overall experience of your edit. Through repetition and experimentation, you can improve your expertise as a video editor and become more proficient in your craft.
If you’re passionate about video editing and eager to improve your skills, you’ve come to the right place. We’re excited to share six exercises that will help you become a faster video editor. Whether you’re a seasoned professional seeking to refine your techniques or a beginner eager to enhance your editing prowess, these exercises will help elevate your editing speed to the next level.
Exercise 1: Practice and use keyboard shortcuts
The quickest way to become faster at video editing is by using your software’s keyboard shortcuts. Learning these shortcuts allows you to complete actions within two or three clicks, and the fewer steps you can take in your editing process, the better.
- Step 1 — Find your software’s keyboard shortcuts: Avid, Final Cut Pro, Premiere Pro and DaVinci Resolve each have their own keyboard shortcuts. Some programs even allow you to import shortcuts from others. So, if you learned how to edit on Final Cut but are switching over to Premiere, you can import the Final Cut shortcuts to Premiere Pro.
- Step 2 — Make a shortcut cheat sheet: Print out your software’s shortcuts and set a goal to master a few each week. We offer our very own Keyboard Shortcuts for Editing Software Cheat Sheet that will make things go much smoother for you. The Cut, Save and Trim keys are likely the ones you’ll use the most, so learn those first. It’s going to take some getting used to, but with enough repetition, using them will become a reflex.
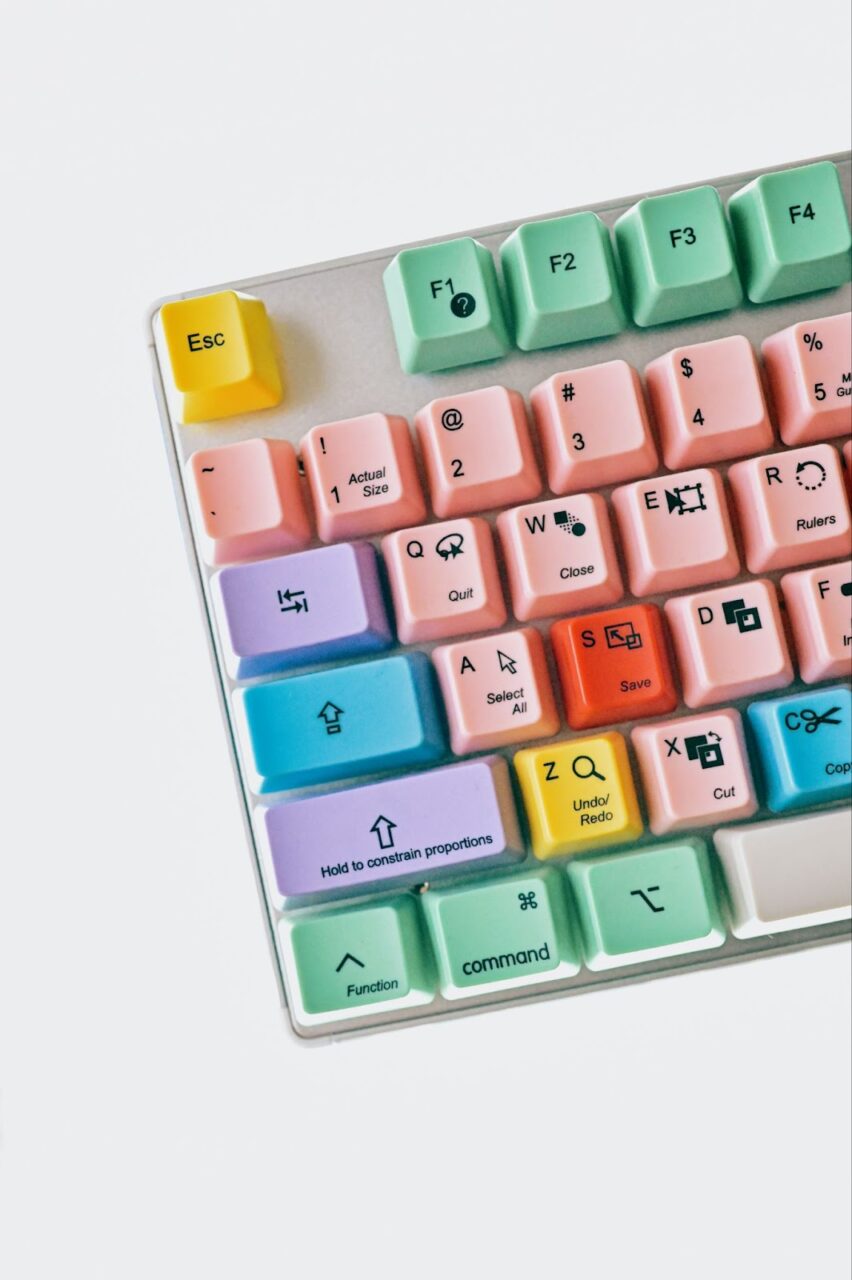
Pro tip: It’s essential not only to know what your shortcuts are but also to understand how to undo certain effects. With countless combinations of keyboard shortcuts, you’re bound to accidentally click on something that deletes content you want to retrieve. Knowing how to undo an edit is just as important as knowing how to apply one.
- Bonus step — Create your own shortcuts and key bindings: If you’re looking for a more personalized editing experience, you can customize your keyboard shortcuts within your software’s keyboard settings. There, you can map editing actions to different keys on your keyboard. Once saved, you can use these shortcuts anytime you edit.
Exercise 2: Explore your software and its tools
Becoming a faster video editor involves not only honing your technical skills but also becoming familiar with the software and its tools. Each editing software has a unique approach to accomplish similar actions, so it’s vital to know exactly where everything’s located.
- Step 1 — Investigate every menu: Take the time to go through all the menus in your video editing software. These menus contain numerous hidden features and options that can significantly enhance your workflow. You may discover specialized effects, advanced editing tools and even useful export settings that you weren’t previously aware of.
- Step 2 — Test out tools: Test your software’s various tools to see what they can do. Really push these effects to understand their full capabilities. While you may never use some of them again, knowing where to look for an effect you do want to use will save you time in the long run. You won’t have to revisit the same video editing tutorial to find that one specific effect.
Exercise 3: Recreate a scene from a movie
Recreating a scene from a movie is a fantastic way to practice a wide range of editing techniques. It challenges you to work efficiently to match the pacing, style and emotions of the original scene.
Before getting started, pick a scene from a movie that you’ll want to try to recreate from scratch in the editing room.
- Step 1 — Analyze the original scene: Start by watching the movie scene you want to recreate. Pay close attention to the sequence’s structure, camera angles, transitions and pacing. Take notes on the key elements that make the scene impactful.
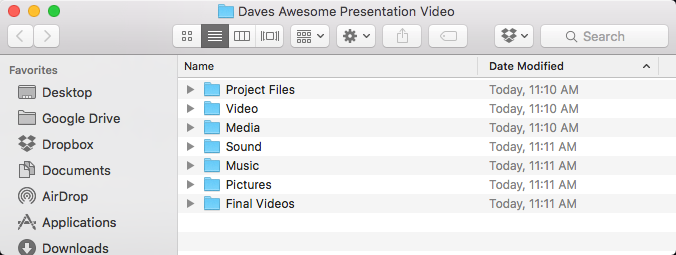
- Step 2 — Gather assets: Collect all the assets you need to recreate the scene. This includes video footage, audio clips, music, sound effects and any required graphics or visual effects. You can create these assets yourself or use stock footage and audio sites. If you’re looking for footage, check out our resources for stock video.
Pro tip: Get organized. Once you’ve downloaded your assets, organize them into folders so you know exactly where everything is. Organizing on the front end will aid your editing process in the long run.
- Step 3 — Begin the editing process: Start recreating your scene by matching the timing and pacing of the original scene as closely as possible. Use the same cuts, transitions and effects as in the original scene. As you edit, utilize the keyboard shortcuts you’ve practiced to expedite your workflow. The more you practice, the more you’ll reinforce your muscle memory for where the keys are.
Exercise 4: Edit to music
Music plays an essential role in editing. The right song can evoke emotions, set rhythm and even enhance the story you’re telling. That’s why it’s so important to be able to edit to music. For this exercise, you’ll take a piece of music and cut a series of random clips to it. This practice can help you improve your pace and rhythm in editing.
- Step 1 — Select a piece of music: Choose a song that you’re already obsessed with or a song that you can’t help but imagine the visuals that go along with it. This helps because you’re going to spend a lot of time hearing it on repeat during the edit — so it might as well be a song that you like.
- Step 2 — Cut random clips to the beat: You can choose a variety of random stock video clips, or you can take footage you have on your phone from a night out with your friends. Once your footage and music are in the timeline, start editing these clips to the beat of the music, aiming to match key moments of video footage and create transitions with the rhythm. If you find yourself tapping your feet along with the music, those taps are great timing indicators for where to place your edits.
- Step 3 — Rinse and repeat: Go back and watch your edits to fine-tune them. Then see if the pacing and rhythm of the music match with the footage, and vice versa.
Exercise 5: Storyboarding practice
A storyboard is like an outline for your video before it’s even shot. It can be a drawing or a series of photos that convey the sequence and order of your final video. Having a well-organized storyboard allows you to know precisely what shots you need and reduces the time spent searching for the right footage during the edit.
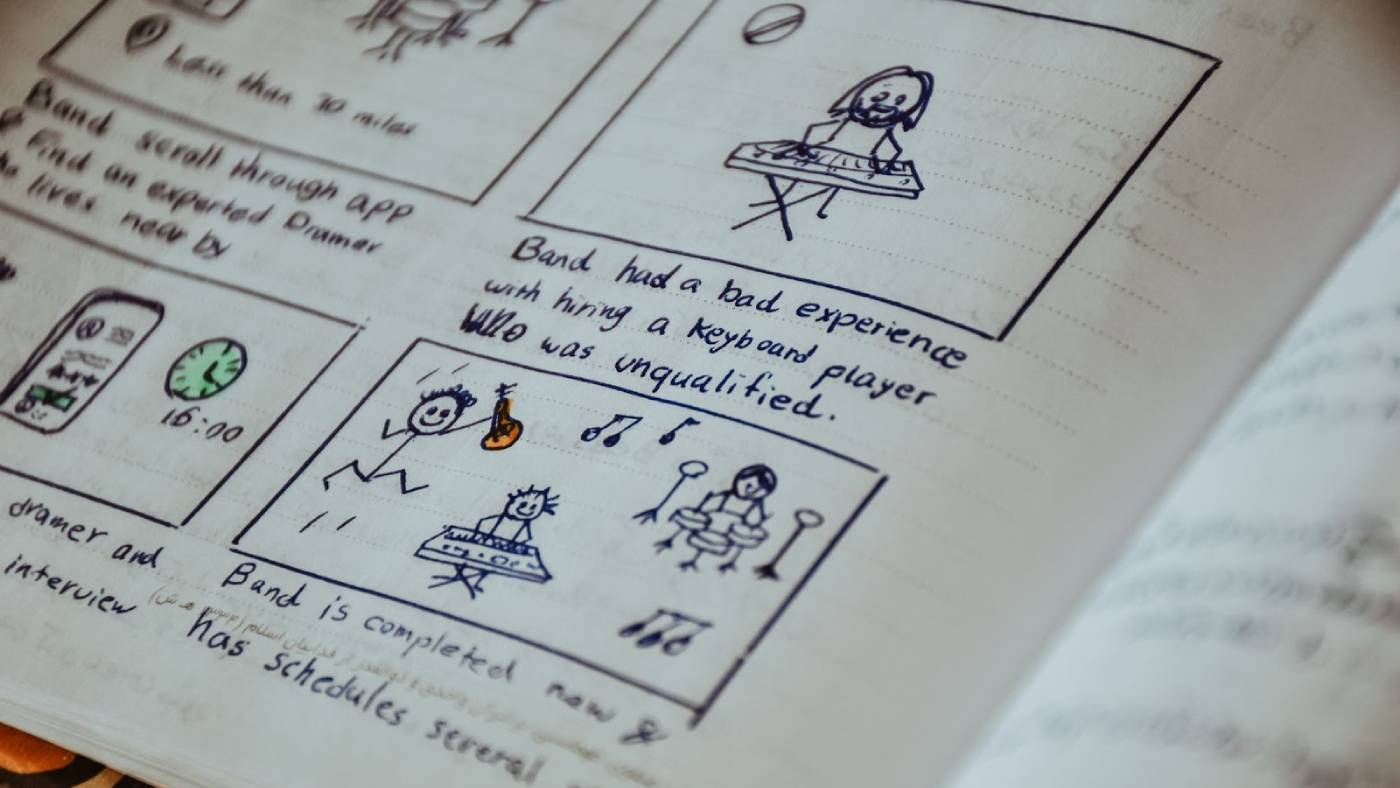
- Step 1 — Create your storyboard: Begin by planning your video and visualizing each scene through a storyboard. You can sketch drawings or use photos to represent the shots you envision. It doesn’t have to be perfect; this is just to communicate what shots will occur in a particular order — stick figures are welcome.
- Step 2 — Follow the storyboard during editing: As you edit, use your storyboard as a roadmap. This helps you stay focused and maintain the intended flow of the story. Follow the planned sequence and order of shots from the storyboard, making your editing decisions faster and more efficient. Having a clear vision of the end result saves you from trial and error, leading to a smoother, faster editing process.
- Step 3 — Edit and revise: It’s a huge help to be able to write down and visualize your story on paper before you get it into your timeline. If something isn’t working out, rearrange the order of scenes in your storyboard in an order that better serves the story before you edit.
Exercise 6: Editing drills
Just like physical exercise, video editing exercises allow you to develop your skills over time. Utilizing the techniques you’ve studied before, here is a series of editing drills you can practice daily or weekly. These exercises will significantly improve your speed, decision-making abilities and proficiency with editing.
- Step 1 — Set aside time for editing drills: Allocate a specific time for these exercises, whether it’s 25 minutes or an hour. Schedule this time so you can work on this skill even when motivation may be low.
- Step 2 — Practice editing raw footage daily for a week: Many of us capture footage on our phones every day. Why not use that footage to create a short film or video? This practice helps in storytelling through visuals.
- Step 3 — Aim to reduce your editing time each day: Challenge yourself to see what you can accomplish in different time frames, such as 10 minutes, one hour or five hours.
- Step 4 — Create a movie trailer using only stock footage: See how you can take pre-shot footage and edit it together to make a trailer for your very own movie.
It takes time to speed up
Becoming faster at video editing takes time, patience and a willingness to embrace the learning process. It starts with exploring your editing software and dedicating yourself to mastering its many features. As you become more efficient, you’ll understand your program like the back of your hand. Your understanding of editing choices will deepen, and you’ll continually refine your techniques. Keep growing and mastering your craft.


