
You’ve purchased a new camera. Now, with a few deep in-breaths and inspiring ideas, you’re ready to venture into the world of video. You take the machine in your hands, and you notice plenty of buttons and have no idea what they do or why are they even there. Don’t panic! Let’s explore and learn about the most common controls found on a camera and the fundamentals of how to use each feature.
The most essential “button” on your camera
Let’s start with the button for your camera that is not even present on the camera itself, but is the most important of all–the user manual.
Before you start to use your camera, open the user manual and carefully read it to familiarize yourself with your camera options, where are they located and how to use them. Although most camera options — such as gain, iso, aperture, and shutter speed, etc. — essentially do the same thing, the way to activate each option varies across camera models. The user manual will help you learn how to use these features and get the most out of them.
Before you start to use your camera, open the user manual and carefully read it to familiarize yourself with your camera options, where are they located and how to use them.
1) Image size and quality
The first thing to do with your camera is to select the recording format you wish to use. If you have a higher-end camera, you will be able to choose from a variety of bit-rates, image quality, image size, frame rate and scanning system (interlace or progressive). Look for these settings on the camera’s main shooting menu.
For more information check out the following training videos:
2) Aperture / Iris
Aperture is the opening of the lens that allows light to pass through your lens to your sensor. The iris is the series of blades that open and close to make your aperture larger or smaller. You can control the iris by using a ring on your lens, a dial on the side of your camera or by accessing a menu.
The aperture is measured by f-stop. The lower f-stop numbers represent more light reaching the camera sensor, while larger f-stops represent less light.
For a detailed explanation check out “Camera Controls & Settings: Aperture.”
3) Shutter Speed
Shutter speed is the sufficient length of time a camera shutter is open. The total exposure is proportional to this exposure time, or duration of light reaching the film or image sensor.
The shutter speed can be controlled by either a dial on the side of the camera or by accessing the menu. Depending on the model of your camera, you may have a variety of shutter speeds to choose from. They will look like fractions– for example: 1/30, 1/60, 1/1000 and higher.
For a more detailed explanation of what you can accomplish with Shutter Speed check out my previous article: “4 Steps to Understanding Shutter Speed.”
4) Gain or ISO
For all practical purposes, Gain and ISO adjust the same thing: the brightness of your image. When there is insufficient light and you need to boost the image brightness digitally, both Gain and ISO can prove useful. However, if you set the values too high, this will give your video more noise.
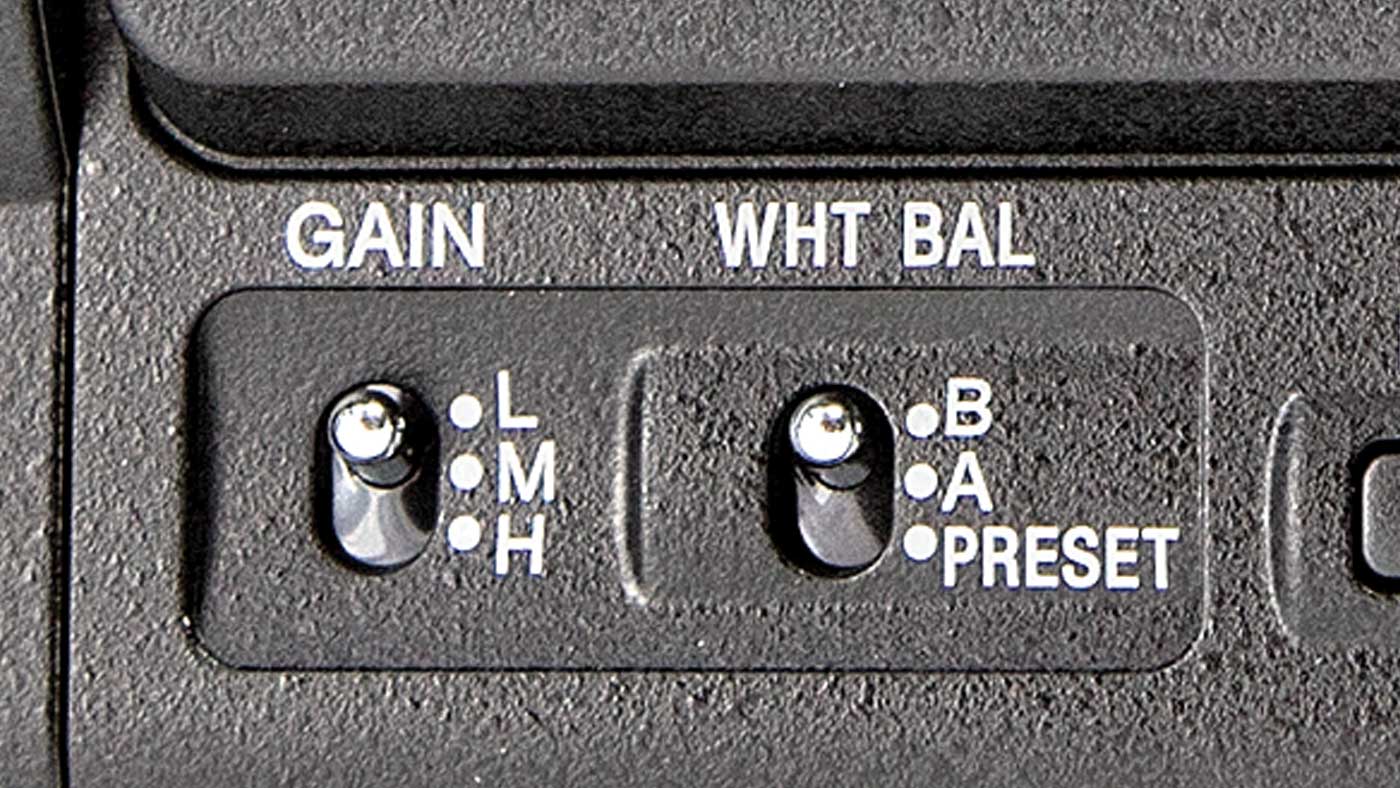
You will find most of the Gain or ISO options in your camera menu. Traditional camcorders typically have three positional gain switches (labeled L, M, and H). These are measured in dB (e.g., 3 dB, 9 dB, 18 dB). The higher the value, the higher the noise. In DSLR you will find a dedicated ISO button and can change values using a dial-in camera.
For a more detailed explanation check out “Camera Controls & Settings: Gain & ISO.”
5) White Balance
When you white balance, your camera will register light and give your image/video a color temperature. Most cameras have a decent automatic white balance setting or preset (indoors, outdoors, among others) that can work pretty well. Additionally, you can check most white balance settings in your camera menu.
Depending on your lighting conditions you will be able to accomplish a different look by playing around with white balance. However, for this article, we will focus on the basics of manual white balancing.
First, find something that is white, like a piece of paper. Then, place it in front of your camera. Finally, push the button or access the options in the menu on your camera to manually adjust white balance.
For a more detailed explanation of what you can accomplish with white balance check out these training videos:
- White Balance Explained
- Setting White Balance
- Let There Be White: White Balance and Color Temperature Explained
6) Focus
Focus is an essential camera control to understand in order to help you get clearer, sharper images. Focus falls into two groups–manual and auto.
Autofocus: When the autofocus is on, the camera will automatically focus the lens for you. Although autofocus can be beneficial, use it sparingly. Not all autofocus settings will get the image as sharp as possible.
Manual Focus: When focusing manually you are in charge of focusing the image. Higher-end cameras will have a focus ring that you will be able to rotate to adjust according to your needs. An excellent tip is to focus on a subject. Then, zoom in all the way, adjust the focus and zoom back out.
For a more detailed explanation check out “Camera Controls & Settings: Autofocus vs. Manual Focus”.
AUDIO
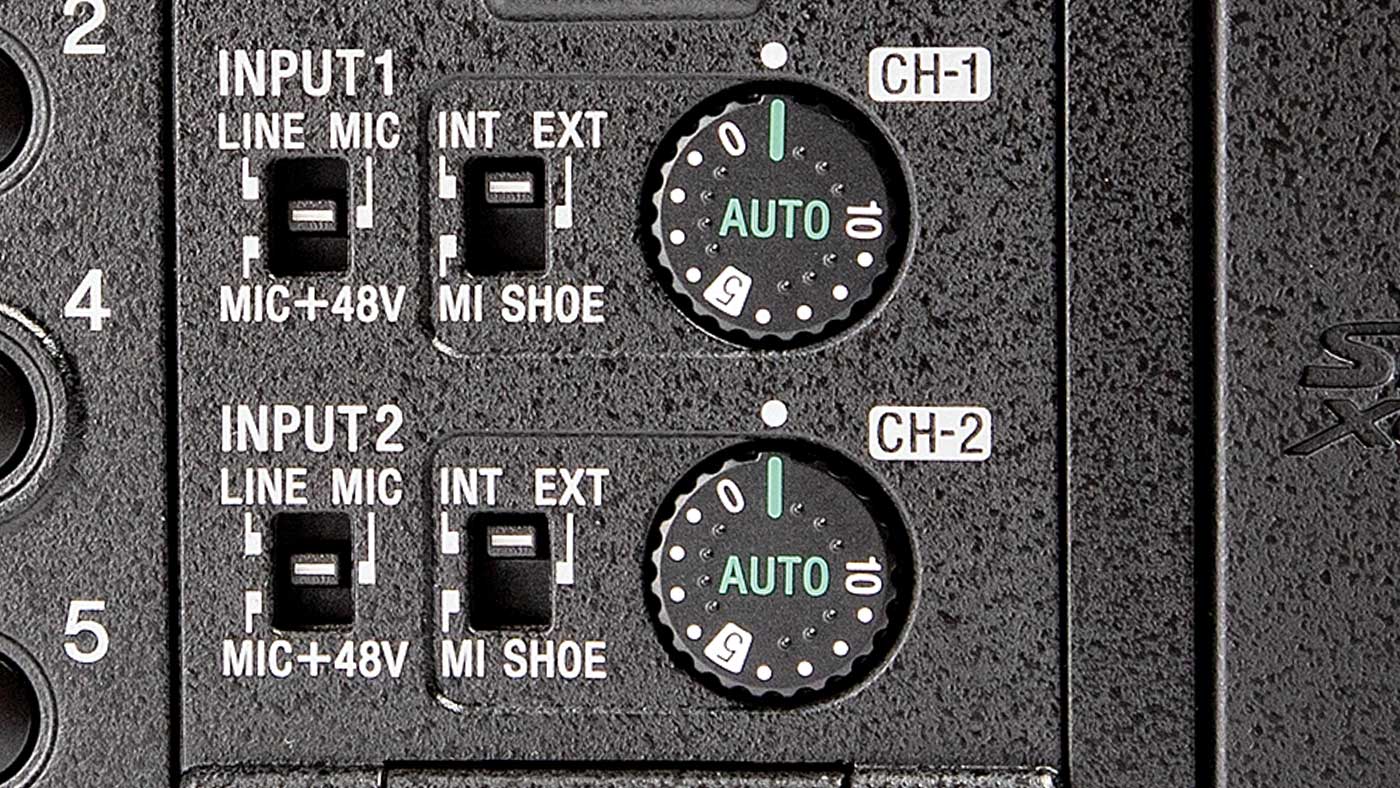
If you have a camcorder, you will have XLR inputs and will be able to adjust the audio gain levels (using a dial) for external microphones you connect via XLR. The camera menu audio settings will provide you with more audio options.
As for DSLR, the camera menu will have some audio controls. That said, you will still need an external device to get high-quality mic inputs.
For more information on audio check out Sound Advice.
Sidebar: Advanced but useful camera controls
• Zebra Pattern
Zebra Pattern is a camera feature that overlays some stripes onto the image that indicate exposure levels. It is a function that aids exposure by showing a striped pattern over the areas that are close to overexposure.
• Focus Peaking
Focus peaking is a focusing aid that uses colored digital highlights (most commonly in white, red or yellow) to identify all the elements of a scene that are in focus. Is intended to determine if images are sharp, crisp and in-focus when you are using manual focus.
NOTE: Not all cameras have the Zebra Pattern or Focus Peaking functions. Refer to the user manual to see if your camera has them.
Now go practice!
Now that you know a bit more about your camera, you’re ready to start experimenting with different settings. It’s time to take you camera into the field to see what you can do.


