We took the Mavic Air 2 on a week-long adventure around Northern California capturing footage and photos of beautiful landmarks. Along the way, people would stop and inquire about the compact drone – A LOT of people. When asked, “What do you think about it?” We found ourselves saying mostly good things.
Whether you are an enthusiast wanting to capture high-quality videos for your social media account or a certified drone pilot with paid gigs looking to update or add portability to your kit – the Mavic Air 2 is ready to up your game.
Specs
Do not let its size fool you. This drone packs plenty of features, including 4K video at 60fps, and a whooping 240fps in Full HD. There is also HDR mode for both video and photo, and impressive 48 MP photos. The Air 2 also comes equipped with some handy operational tools such as FocusTrack, APAS 3.0 Obstacle Avoidance, OcuSync 2.0, and ADS-B AirSense. Those acronyms might not mean much to you know, but we’ll go over what they mean throughout the review.
Ergonomics
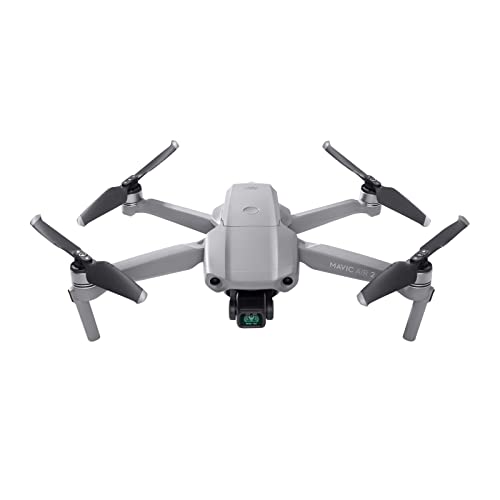
The ergonomics are a strong consideration when choosing a Mavic Mini; however, if you are looking for more capability while retaining portability, the Mavic Air 2 is a great option. It is capable enough to hold its own against higher-priced drones, yet it can fold up and tuck away into a pocket of a camera bag. Being able to have a drone wherever and whenever you want is paramount, especially for documentary filmmaking, journalism, event videographers and just about every professional video producer that wants a drone on demand that is capable and will not break the bank, as it is priced at $799.

The Mavic Air 2 at 570 grams weighs just over double that of the Mavic Mini. [A side note: all drones weighing more than 250 grams must be registered]. They both fold up to be incredibly compact with the Mavic Air 2, adding only 20mm – or less than an inch to each dimension.
New controller
The Mavic Air 2 also comes with a newly redesigned controller, and we are huge fans of the new design. It is comfortable in your hands, compact and easy to set up and tear down. To top it all off, the controller can now charge your phone! Lastly, we like that the phone now goes above the controller. It’s located in a better place for access and doesn’t get in the way like a controller with an underslung phone will.
Also, the way they incorporated the built-in phone connector is genius. It tucks away for storage and is quickly accessed when setting up. The new retractable phone clamp design is another nice improvement to the controller’s design. The integrated antennas are a welcomed improvement that lends to the overall improved ergonomics.

One inconvenience we encountered was that the flight mode switch can only be switched using your thumbs while in flight. When piloting the drone, your thumbs are tied up. We found ourselves several times trying to switch flight modes using our mouth during the middle of a shot. Why did DJI change this from previous controllers? We prefer the previous ones much more.
Menu
It seems just about every aspect of this drone and the user’s experience has seen updates and improvements, and the app is no different. Changing resolutions or capture modes takes only two quick taps on the screen. Tap the mode selection icon, and all your options present themselves in one rudimentary pop-up menu.
From here, you are only one tap away from selecting between frame rate options, resolution choices, and filming modes such as HDR, Normal or Slow Motion. From the same menu, you can also choose your capture mode – either video, photo, quickshot, hyperlapse, or pano.
Shoot assists
The Mavic Air 2 offers some basic shoot assists, but with little customization. Things such as histogram, overexposure warning, and gridlines are available to toggle on or off, but that is about all.
Media
The Mavic Air 2 offers one SD card slot found on the chassis. The manufacturer requires a UHS-I Speed Grade 3 rating microSD card, but we recommend a minimum capacity of 32gb. They are relatively affordable and readily available. What you might not expect is that the Mavic Air 2 has 8GB of internal storage. This is a mighty handy feature!

When you run out of storage on your SD card, you will get a notification, at which point you can switch over to internal storage and begin to wrap up your filming. This also means that if you forget to bring media with you, you’ll have at least 8GB ready to use if you forget yours at home.
The image
When it comes down to it, the image is what matters the most and we feel the image quality is more than enough to impress us and your clients. The max bitrate on the Mavic Air 2 is 120Mbps. Just for reference, the Mavic 2 Pro’s max bit rate is only 100Mbps, and a Phantom 4’s max bit rate is a meager 60Mbps. The ½” sensor can capture 4:2:0 8-bit video at up to 60fps in 4K UHD, and up to 240fps in Full HD.
HDR and D-Cinelike
The closest you get to Log with this drone is D-Cinelike. It’s the flat-shooting profile that expands flexibility in post-production. We found this mode can produce similar results to the HDR mode, except you will need to spend more time color grading in post. It is worth a mention that the D-Cinelike profile has the advantage of manual exposure settings over HDR mode.
HDR [High-Dynamic Range] is a new picture profile offered on the Mavic Air 2, providing you with a stunning image right out of the camera. Similar to the D-Cinelike profile, HDR boosts the amount of information in the highlights and shadows when a scene has very high contrast. An area where drones in this price range have typically struggled. While in HDR mode manual exposure settings are turned off and you’re stuck with full auto exposure. Be mindful of this while shooting your scene to avoid exposure adjustments mid-shot.
Rolling shutter
The camera does suffer from rolling shutter. Just like with any camera that has rolling shutter, stay away from quick pans, as this is when it is most noticeable.
Image stabilization
Image stabilization on the Mavic Air 2 is rock steady. Virtually every video clip we filmed was usable. Maybe once or twice when we slammed on the brakes in sport mode did the gimbal react poorly. Even when taking somewhat long exposure photos – long enough to make moving water streak, the stabilization held firm and provided very crisp results.
Manual controls
The is no manual focus option to speak of and everything remains infinitely in focus. If you consider this a drawback, and require such a feature, then there are other drones that better suit your needs.
There is, however, manual exposure controls, which is necessary for professional work. Switching to manual controls unlocks ISO and Shutter. ISO ranges from 100 to 6400, while shutter speeds range from 1/25 of a second up to 1/8000. Sorry, no aperture control, which is fixed at F 2.8.
Photo quality
A whopping 48 MP photo option, AEB [auto exposure bracketing], Smart photo, and burst options make the Mavic Air 2 one of the most powerful photography drones on the market, in and out of its price range. The 48 MP photos were breathtakingly detailed – enough to crop in and still have a high-quality, usable image. We felt as if the image was a tad bit sharper at the center and tapered off a little as you moved out to the corners, but nothing we would complain about.
We also enjoyed plenty of processing latitude in the highlights and shadows on photos taken using AEB. Photos taken in 48 MP will have the most dynamic range when shooting in AEB or SmartPhoto. While these modes all produce quality results, the new SmartPhoto option was a tier above. SmartPhoto optimizes your camera settings based on the type of scene.
Whether in stable lighting conditions or low light scenarios, SmartPhoto significantly improves the amount of dynamic range. SmartPhoto will layer shots, use HDR and HyperLight, and make any camera adjustments needed to get the best possible outcome.
Autonomous flight
FocusTrack is what DJI calls “advanced tracking” and is quite possibly our favorite feature of the Mavic Air 2, though it does have its limitations. The FocusTrack capabilities allow a complete novice to capture buttery smooth cinematic shots. It is so easy to capture amazing shots you could technically do it with your eyes closed—though you should keep your eyes open at all times when flying a drone.
There are three variations of FocusTrack to choose from – Spotlight 2.0, ActiveTrack 3.0, and POI 3.1 [Point of Interest 3.0]. To begin, all you need to do is drag a box around a subject on your screen and then choose from the three different tracking options.
With Spotlight 2.0, you can fly the drone however you want, and the Air 2 will keep your subject in the center of your shot. After selecting your subject, POI 3.0 is fully autonomous. The aircraft will fly around its subject at the specified altitude and flight direction. You can adjust the speed and direction in real-time if you choose.
ActiveTrack 3.0 will track the selected subject autonomously. It will adjust speed, altitude, gimbal pitch, and everything needed to stay locked onto its subject. However, there are some limitations to these options – primarily a lack of side-facing sensors. The drone will not avoid obstacles that are in its blind spot, and this could spell disaster if you are not aware. Also, if obstacles obscure the vision of its subject, the tracking may be interrupted. However, the drone does a pretty good job of maintaining focus even during the temporary concealment of its subject. If the focus is lost, the drone will hover in place.
Quick shots
The Mavic Air 2 is loaded with all the newest and best quick shots available:
There is Dronie, or drone selfie, where the drone fixates on a subject and then flies up and away from the subject to reveal the surroundings.
Circle, the drone rotates around a subject in a basic circle.
Helix, a variation of Circle, but adds more dynamic movement by flying upward and outward as well as rotating around its subject.
Boomerang, which is similar to Helix except once it’s reached a designated distance and altitude it will begin to swoop back in towards the subject.
Rocket, which is a sort of pedestal type shot in which the drone rises up while tilting the camera down — all the while keeping its subject well framed.
Asteroid starts at ground level trained on a subject and the rockets backward up into space while warping the image into a “tiny Earth” type result.
We saved Asteroid for last. Although this is a pretty neat trick, it is unlikely it will ever make it into one of your client’s videos.
Do they work?
FocusTrack and the Quick Shots do work and work very well. FocusTrack is an incredibly powerful tool, and once you discover it, you will find yourself relying on it quite heavily. These tools are the difference between having to repeat a shot over and over versus nailing the shot on the first take. For better or worse, once we discovered the power of these tools, we began to rely less on our own antiquated manual flight skills and more on these intelligent capabilities.
Performance
Batteries
The performance of the batteries is astonishingly good. The manufacturer claims a 34 minute max flight time, and during our tests lasted less than 30. While performing typical flight operations, we were getting around 25-27 minutes of usable flight time while in normal mode, however, we returned home when there was 15% left on the battery.
It is possible to end up getting just shy of 30 minutes of flight time by the time you’ve landed. The amount of flight time does vary depending on your situation. The flight mode you are using, altitude, temperatures, and wind speed will all play a role in how long your flight could last. As far as total distance, you can expect anywhere from 4-7 miles with a fully charged battery, depending on flight conditions.
Low light
The Mavic Air 2 performs just fine during morning and evening civil twilight as well as during morning and evening golden hours. We would not recommend capturing at night, in which case you would also need to obtain authorization from the FAA to fly legally. The HyperLight setting in photo mode is your best bet to get high-quality results in weak lighting situations. This mode will provide results with less noise and increased clarity.
Obstacle avoidance
APAS 3.0 Obstacle Avoidance is a nice feature to have. Where sensors are pointing, the drone does a good job of avoiding obstacles and collisions. The display also clearly depicts where the obstructions are in relation to your drone. The significant shortcoming is no side-facing sensors, which diminishes the true potential of obstacle avoidance.
Speed
Max horizontal flight speed is listed at 19m/s (meter per second) for sport mode and 12m/s in normal more, or 42.5mph and 27mph respectively. We certainly hit these values and even topped out in the high 40s with a tailwind.
ND filters
DJI offers two different sets of ND filters for $65 each, pick from the 4/8/32 and 16/64/256 sets. For video, we found ourselves using the 4, 8, and 16 filters the most. The higher density filters, such as 32, 64, and 256 are primarily for long exposure photography. Typically you will not find drone ND filters that go up this high; however, the Mavic Air 2 is a good photography drone. The fact that there are ND filters specifically geared towards photography could suggest some may buy this drone primarily for photography.
Perks and quirks
Perk 1
8K Hyperlapse is a powerful new tool at your fingertips. With a few taps on the screen, your drone is now automatically performing what used to be an arduous task. If you are familiar with keyframes in post-production, then you will be right at home with how easy it is to set up a hyperlapse on the Mavic Air 2. There is also a convenient indicator that warns if your camera angle rotation is too large for the hyperlapse to be smooth. A Hyperlapse also requires no post processing and is saved as a video clip onto your SD card, which we thought was convenient.
Quirk 1
We took several hyperlapses; however, only one turned out to be usable. Our hyperlapse shots did not turn out the same way as seen in DJI’s marketing videos. It was jumpy and not the buttery smooth shot we wanted. The wind is a strong influencer in this situation, especially with a smaller and lighter drone, yet during some of our takes, the wind was negligible.
Perhaps worth noting, the one hyperlapse we felt was acceptable was filmed in 1080 not 8K. This allowed us a capture interval of 2 seconds versus the 6-second minimum interval in 8K mode. Perhaps with more time and more situations with the drone will result in smoother hyperlapses. However, out of the gate we were not impressed. DJI responded to this saying “4K will be available very soon, which would alleviate a portion of the issues.”
Perk 2
APAS 3.0 Obstacle Avoidance makes avoiding objects easier when piloting, and also makes for decent footage in autonomous modes like FocusTrack. Indicators in the DJI FLY UI display when objects are near. When you approach an obstruction, the Mavic Air 2 will gently guide itself underneath, around, over an object, or even put on the brakes. We eventually got comfortable enough to where we would intentionally fly our drone close to the edge of an object, and allow the obstacle avoidance to gently nudge us past the obstruction – providing us with really up close foreground without any fear of collision.
Quirk 2
However, a glaring drawback we noticed is the lack of side-facing sensors. Because of this, the drone will attempt to avoid an obstacle in front of it or behind it only to steer into an object on either side or above. To allow APAS 3.0 to thrive truly, the drone should have sensors facing in all directions.
Perk 3
ADS-B AirSense is a brand new feature that will be implemented in just about every DJI drone moving forward. This handy tool warns the drone operator if a manned aircraft is approaching your drone’s location. A text warning appears in the top corner of the UI, accompanied by an audio cue that recommends to “fly at a safe altitude”; also, there is a mini-map in the bottom corner which displays where the manned aircraft is in relation to your drone. A few seconds after we got our first warning of a manned aircraft being nearby, we then heard the plane approaching from a distance, “how cool is that!” we thought.
Quirk 3
One thing we noticed about AirSense was that there is no altitude indicator of the nearby manned aircraft. Until further iterations are made, it is probably just a safe bet when you get a warning from AirSense to drop your altitude.
Perk 4
OcuSync 2.0 enables the Mavic Air 2 an incredible 10km video transmission range. We compared a Phantom 4 and Mavic Mini versus the Mavic Air 2’s transmission range, and it was not even close! We find it unnecessary and likely not legal to fly more than a mile or so away. The Air 2 performed excellently as we experienced just about zero latency issues and received very clear video transmission throughout all our flights.
Quirk 4
The10km transmission range is possible, yet depending on the terrain, you could run into sketchy transmission at much fewer distances. We also feel the 10km range is not necessarily there to fly that far away while receiving a signal, but rather to make sure the signal is rock solid within standard flight ranges.
Marketplace
We would honestly put the Mavic Air 2 in a category of its own. You will not find another drone with the capability, portability and affordability this drone offers. To get similar features or some additional features, you would need to jump up to the next budget tier with something like the Mavic 2 Pro or Zoom. Even if you increase your budget, you will be losing a lot of the newest technology that comes with the Air 2. For half the price, you could score the Mavic Mini; however, if you are using your drone to make money, we would not recommend anything less than the Mavic Air 2.
Conclusion
The Mavic Air 2 is such an incredibly powerful creative tool. It is loaded with all the latest features and is an absolute pleasure to operate. Just about every setting or option is accessible with only two or three taps of the screen. Set up times are significantly less than other drones, and it is incredibly easy to capture cinematic footage. We would have liked to see side facing sensors, manual focus control and multiple SD card slots. If we continue along this path of improvement, we cannot wait to see what new features and technology will be added to future models of the Mavic Air series.
Strengths
- 4K up to 60fps
- SmartPhoto and 48 MP photos
- Affordable
- Portable
Weaknesses
- No side facing sensors
- One SD card slot
- Moire
- No manual focus
Recommended uses:
- Documentary filmmaking and journalism – run and gun videography where conditions are unpredictable and agility is key
- Corporate and event videography – situations where ease of use and reliability is more important than the film look
- Marketing video production – short form video produced on a schedule
- Online video production – a well-produced YouTube video, for example
- Casual video production – home video, vacation highlight reels and any other project that is minimally planned
Specs
- Maximum Horizontal Speed
- 43 mph / 19 m/s (S-Mode)
- 26.8 mph / 12 m/s (P-Mode)
- 11.2 mph / 5 m/s (T-Mode)
- Maximum Ascent Speed: 9 mph / 4 m/s
- Maximum Descent Speed: 11.2 mph / 5 m/s
- Operating Frequency:
- 2.4 GHz (2.400 – 2.484)
- 5.8 GHz (5.725 – 5.850)
- Maximum Operating Distance: 6.21 Miles / 10 km at 2.4 G
- Connectivity:
- 1 x Micro-USB
- 1 x USB Type-C
- 1 x Lightning
- Sensor : 1/2″ CMOS
- Effective Pixels: 48 MP
- Focal Length: 24mm (35mm Equivalent)
- Lens Field of View: 84°
- Aperture: f/2.8
- Minimum Focusing Distance: 3.3′ / 1.0 m
- Photo ISO Range:
- 100 to 3200 (Auto)
- 100 to 6400 (Manual)
- Video ISO Range: 100 to 6400
- Photo Resolution: 4:3: 8000 x 6000
- Photo Format: JPEG, DNG
- Video Format
- 3840 x 2160p at 24/25/30/48/50/60 fps (MP4/MOV via H.264/AVC, H.265/HEVC, MPEG-4)
- 2688 x 1512p at 24/25/30/48/50/60 fps (MP4/MOV via H.264/AVC, H.265/HEVC, MPEG-4)
- 1920 x 1080p at 24/25/30/48/50/60/120/240 fps (MP4/MOV via H.264/AVC, H.265/HEVC, MPEG-4)
- Recording Media: SD (up to 256 GB)
- Photo Modes: Auto-Exposure Bracketing (AEB), Burst Shooting, Interval, Single Shot
- Gimbal Number of Axes: 3 (Pitch, Roll, Yaw)
- Battery Chemistry: Lithium-Ion Polymer (LiPo)
- Capacity: 3500 mAh / 40.42 Wh
- Operating Temperature: 32 to 104°F / 0 to 40°C
- Diagonal Size: 11.9″ / 302 mm
- Overall Dimensions:
- 3.8 x 3.3 x 7.1″ / 97.0 x 84.0 x 180.0 mm (Folded)
- 10.0 x 3.0 x 7.2″ / 253.0 x 77.0 x 183.0 mm (Unfolded)
- Weight: 1.25 lb / 570 g


