
The world of drone videography just got a whole lot more exciting. DJI, well-known as an innovator and industry leader, has just released its latest highly-anticipated drone. In this review, we’ll explain why the DJI Mavic 3 Cine is the most capable drone on the market.
The DJI Mavic 3 Cine in a nutshell
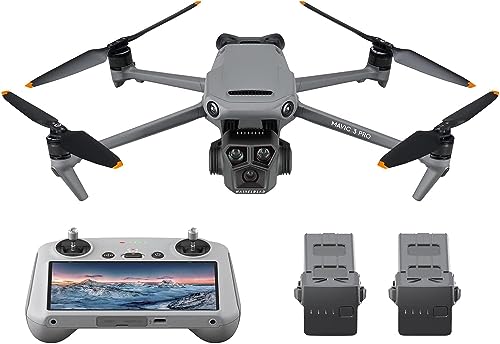
The DJI Mavic 3 Cine is an amazing new tool available to drone videographers. It features a powerful new camera system and is loaded with safety features and other advanced flight technology. It comes equipped with not one but two cameras: a main Pro camera and a telephoto camera. The Mavic 3 Cine captures video up to 5.1K resolution and offers 10-bit D-log, takes 20MP stills and has substantial flight time. The Mavic 3 Cine includes 360-degree obstacle avoidance and advanced return to home to keep the drone safe. Plus, it boasts O3+ and a slew of other nifty features. Those include things like ActiveTrack 5.0, Mastershots, Quickshots, Hyperlapse and higher frame rate options — 200fps in 1080p and 120fps in 4K.
Standard vs. Cine
There are two versions available of the Mavic 3: the Standard and the Cine. The Cine version sells exclusively with the Premium Fly More Combo for $4,999. That includes the DJI RC Pro remote, extra batteries and other accessories. The Standard version can be bought by itself or with the Fly More Combo for $2,199 and $2,999, respectively.
There are really only a couple of differences between the Standard and the Cine models. The Cine has 1 TB of internal storage versus 8 GB on the Standard. The Cine version also supports Apple ProRes 422 HQ. Other than that, the two drone versions are essentially the same.
When deciding which drone you should get, consider whether you need ProRes. If so, then you need to get the Cine version. For lots of drone videographers, ProRes might be overkill. Unless you know you need to deliver in that format, then you’re probably okay with the Standard model.

Two cameras?
The single most noticeable difference with the introduction of the Mavic 3 Cine is the new camera module. The drone’s gimbal is now mounted with an over-under, dual-camera system. The new and improved Hasselblad pro-camera features a robust Four-Thirds CMOS sensor. It has an equivalent focal length of 24 mm and a manually-adjustable aperture from f/2.8 to f/11.
Mavic videographers no longer have to choose between the pro model and the zoom model. That’s because, in addition to the main 20 MP wide-angle Hasselblad camera, there’s also a 12 MP telephoto camera with a 1/2-inch CMOS sensor. The telephoto camera is a nifty tool to capture far-away subjects or keep your drone a safe distance from hazardous objects; however, you lose the ability to adjust camera settings manually when using the telephoto camera. The telephoto camera also only shoots in JPEG, so no RAW. Then there’s the fact that the quality of the image also gets soft and fuzzy since the zoom is all digital. Plus, even with the Cine model, ProRes is unavailable with the zoom lens. But what we really don’t understand is why you can’t shoot in D-log when using the telephoto lens.
All things considered, the telephoto camera is more or less a marketing headline that is really limited in its practical use situations.

The image
Right out of the camera, the image quality of the Mavic 3 Cine is an upgrade over the Mavic 2 series. Both Mavic 3 models feature the Hasselblad Natural Color Solution, delivering professional-looking results with minimal time in post. The Mavic 3 models capture 5280×3956-pixel stills and 5.1K resolution video at up to 50fps at a bitrate of 200mbps. That’s twice the bitrate on the Mavic 2 Pro. It also records up to 120fps in 4K and up to 200fps in 1080 with the recent firmware update. The top resolution provides plenty of flexibility for cropping and reframing in post without losing image quality.
The Four Thirds sensor also boasts 12.8 stops of native dynamic range. This retains more details in the shadows and highlights, making your work look more professional. With the increase in sensor size, you also get better low-light performance, more detail and improved control over depth of field. Essentially, you get an all-around better image.
Included with the fly more combo is a set of 8 ND filters ranging from ND4 all the way up to ND512. These help you capture smooth video and hyperlapse footage on bright sunny days. Without the ND filters, the shutter speed must be turned up too high, which causes choppiness in your footage. With the manual controls and a high ND filter available, we would have loved to try some awesome long exposure drone photography. However, the Mavic 3 Cine’s minimal shutter speed is 2 seconds. If that speed were a bit longer, it would allow for some really creative works of art.
Flying the Mavic 3 Cine
Flying the Mavic 3 Cine is an absolute pleasure. It has the most incredible flight time: up to 46 minutes! This is thanks to a new 5000 mAh battery. However, this max flight time is calculated in a closed environment and in favorable conditions. All things considered, the battery does last an unusually long time. This allows pilots more time to scout their location before filming. We found ourselves getting all the shots we needed with just one battery! We even had plenty of time to fly around for a while just to see what else we could get.

We’re used to drones running out of batteries quite often and at the worst time possible. When we assumed we should prepare to land, we were surprised to see the Mavic 3 Cine battery was still half full. You’ll be hard-pressed to chew up all your batteries and not get the shots you need. The batteries do take a very long time to charge, however: roughly 2 hours each. The Fly More Combo also comes with a charging hub. With this, you can set all 3 batteries to charge overnight and wake up fully charged ready to go.
The Mavic 3 Cine’s top speed is 47 mph in sport mode. This is more than plenty for our needs. In fact, we wish DJI would bring back tripod mode, which really throttles down the movement speed of the drone to get great slow-moving cinematic shots. Though, there is an option to use the drone’s Cine flight mode, which decreases flight speed to 5 m/s and ascent/descent to 1 m/s.
DJI has also greatly increased the vertical movement speeds while ascending or descending. The Mavic 3 is also very quiet while in flight. The new propellers are designed to make less noise. Plus, it’s a less irritating tone. It is nice to know that, when lifting off, it’s much quieter. Everyone in a two-block radius no longer knows the moment you lift off with your drone.
Controller upgrade
It was such a pleasure using the DJI RC Pro controller. It comes with the Mavic 3 Cine Premium combo or as an additional $1,200 add-on. We especially loved not having to use our phone as part of the setup and operation. This also minimizes set up time.
The controller feels really nice. It has professional build quality, nice tacky grips that make it a secure feel and metal joysticks. The screen is a good size and is very bright at 1,000 nits, according to DJI. It transmits a 1080p/60fps live feed to the pilot. The picture quality is simply fantastic. The colors are beautiful, the image is crisp and clear and it’s all delivered in real-time. We really didn’t experience any major latency issues.
Unfortunately, if you don’t scoop up the Cine version or pay up for the Pro remote, you’ll be using the same remote as the DJI Mini 2 and the DJI Air 2S. This isn’t a deal-breaker, but it just doesn’t feel as special to fly the Mavic 3 with the older remote. The only downside to the Pro remote that we could come up with is that it’s rather large; it will chew up space in your camera bag if you prefer to travel with a compact kit.
DJI O3+

DJI has made yet another improvement to what is now formerly known as Occusync. O3+ is new on the Mavic 3 Cine and claims to offer a 15km max transmission range when unobstructed, free of interference and FCC-compliant. The new and improved O3+ offers a strong and reliable signal for Mavic 3 Cine pilots. The 15km range is a bit overkill; most people will never fly that far away, or at least be able to do so legally. The strong signal is a quality of life improvement, and we were really happy with it. When you don’t have to worry about the steadiness of the connection while flying, it makes flying a drone that much more enjoyable.
As good as O3+ is, it’s not perfect. We experienced at least one drop in connection or latency issue. Oddly enough, this happened within very close range.
Omnidirectional sensors
While the Mavic 2 technically had omnidirectional obstacle sensing capabilities, some of the sensors were only infrared sensors. However, on the Mavic 3 Cine, there are now multiple wide-angle obstacle sensors facing in all directions.
The interface on the remote is also updated to reflect this improved safety feature. It now displays detected obstacle information in a clear and concise manner, to within a fraction of a foot. The display tells you exactly how close nearby objects are to the drone. We found this really helpful when piloting right next to obstacles in order to sell the drone movement.
APAS 5.0
An often improved feature on the recent Mavic drones is the APAS obstacle bypass system. Now with omnidirectional obstacle sensing, the Mavic 3 Cine has the greatest potential to fully utilize this feature.
The Mavic 3 Cine senses objects at a much further distance than other Mavics and will begin to make adjustments accordingly. This is really impressive as you can see the drone self-adjust to avoid obstacles. In our case, we actually found the APAS to be a bit too sensitive and its reactions sometimes overdone. When trying to capture a gentle cinematic shot, the bypass mode would sometimes abruptly cause the drone to alter its flight path. This would ruin the gentle cinematic shot. It’s always great for large grand aerials, but we also don’t necessarily need assistance avoiding obstacles in this case. There are options to disable bypass mode and opt to either come to a stop or disable APAS altogether.
All things considered, the technology is nice to have. It does what it’s designed to do, and it’s there to ensure you’re better safe than sorry.
Activetrack 5.0
We already know from previous DJI drones that Activetrack is arguably one of our favorite features. This new version is even better than version 4.0.
Our favorite thing to do is to simply drag a box around your subject on the DJI RC Pro or on your cell phone screen. The drone locks onto that target and keeps it the subject of your shot. In a way, you can create your own custom quick shots by doing this.
ActiveTrack 5.0 and some other options such as Mastershots, Quickshots and higher frame rate settings.
Build quality
Clearly, a lot of consideration and effort went into making this drone sleeker and more aerodynamic. It holds its ground rather well in windy conditions, maneuvers gracefully and flies effortlessly. Everything you touch just screams high quality, from the drone itself to the carrying case, the new gimbal harness and the remote.
Perhaps overlooked by some, but one of our favorite new features is the gimbal cover. At first, we thought we would be battling this new contraption until the next drone comes out. In fact, it is a pleasure to use. It’s really quick and easy to attach the harness over the gimbal and props. Plus, thanks to the high-quality build of both Mavic 3 models, you don’t feel as if you’re going to break anything in the process. Our hats off to DJI for finally making a gimbal cover that doesn’t feel as if you’re going to break the gimbal itself trying to put it on.

What about the case?
The carrying case that comes with the Fly More Combo and the Cine Premium package is also of high-quality construction. It’s one of the best cases DJI has ever included with the Fly More package. It’s made from a rugged canvas material with an even more durable leathery bottom and all-metal buckles. The interior is lined with a luxurious feeling suede material. There are pockets specifically designed where the drone, batteries and controller are stored. There’s also extra room for all the accessories as well.
The case can be configured in a number of ways, too. First, it can work as a briefcase by simply holding the bag by the top handle. There’s also a shoulder strap so you can wear it like a messenger bag. You can also convert the bag into a backpack and wear it around comfortably for longer periods of time. When converting the case into a backpack there is quite a bit of extra storage space.
The case alone sells for $319 on the DJI website, making the Fly More Combo seem like an even more attractive offer. All things considered, when buying a nice product such as the Mavic 3 Cine, it’s nice to know you’re getting a quality bag to transport and store your new piece of kit.
Media
There’s just one micro SD card slot on the Mavic 3 Cine chassis. The Cine model comes with a built-in 1 TB SSD. The standard model only has 8 GB of built-in storage. It would have been nice to see more internal storage on the standard model such as 64GB. There’s not much you can do with 8GB, but at least you can grab a few shots in a worst-case scenario.
The media compartment is located in a more convenient location than some other models. You no longer have to unfold a couple of the arms to gain access to the media port.
Cons
The Mavic 3 Cine piles on the new technology and safety features. It’s the most capable Mavic drone yet, but it does have some quirks and issues to address. With the Cine version, we thought it was cool that the drone had a massive built-in storage. However, we found it annoying to offload our footage directly from the drone to our computer. We’d prefer removable media and spend less on the drone for internal storage.
Thankfully, the Cine version still has a micro-SD card slot, so a client can provide you with media and you’re able to hand them the footage at the end of the day. Some of us also prefer to be able to swap out SD cards at intervals throughout the day in case of an accident. That way, we never lose too much footage. If you’re going to rely on the internal storage, you could end up wishing you had just gone with micro SD cards if a crash damages the drone or storage, preventing you from retrieving the footage.
Next is not really a con per se, but simply just confusing to us. When DJI released the Mavic 3 Cine, they did so without many of its powerful features we have all come to know and love: ActiveTrack, Quickshots, Mastershots, Hyperlapse, certain recording options and more. However, the Mavic 3 Cine will eventually have all of its features, and we will no longer be able to complain about this.
Also not really a con per se but more of a wish list item: We would have loved to see a built-in ND filter. Especially with the two cameras having different exposure settings, this would really help out and save time when switching back and forth between the two cameras.
During our experience with the Mavic 3 Cine, we couldn’t help but wonder who the drone was for exactly. The Cine model costs just about as much as an Inspire 2 with the X5 camera but lacks the support for interchangeable lenses and multiple operators. On the other hand, the standard Mavic 3 Cine costs more than twice as much as an Air 2S without being twice as good.
Final thoughts
The highly-anticipated Mavic 3 and Mavic 3 Cine have more or less delivered what the fanbase wanted: a quality upgrade from the Mavic 2 Pro. However, its price point will cause much deliberation among drone pilots. Some may opt for an Air 2S or buy an Inspire 2. Overall, we were really happy with the performance of the Mavic 3. When asked, we would pause and consider all other options when making a recommendation. If you do go for the Mavic 3, we’d choose the standard version with the Fly More combo. This offer gives you the most value for your dollar.
Strengths
- 4/3 sensor
- Beautiful image quality
- Long battery life
- Safety features
Weaknesses
- Expensive
- Telephoto lens not up to par
- Missing features at launch
Specs
| Max flight time (no wind) | 46 minutes |
| Max hovering time (no wind) | 40 minutes |
| Max flight distance | 30 km |
| Max wind speed resistance | 12 m/s |
| Internal storage | 1TB (available space is approx. 934.8 GB) |
| Hasselblad camera sensor | 4/3 CMOS, Effective pixels: 20 MP |
| Hasselblad camera lens | FOV: 84° Format Equivalent: 24 mm Aperture: f/2.8 to f/11 Focus: 1 m to ∞ (with autofocus) |
| Hasselblad camera ISO range | Video: 100-6400 Still Image: 100-6400 |
| Hasselblad camera shutter speed | Electronic Shutter: 8-1/8000 s |
| Hasselblad camera video resolution | Apple ProRes 422 HQ 5.1K: 5120×2700@24/25/30/48/50fps DCI 4K: 4096×2160@24/25/30/48/50/60/120*fps 4K: 3840×2160@24/25/30/48/50/60/120*fps |
| Video formats | MP4/MOV (MPEG-4 AVC/H.264, HEVC/H.265) MOV (Apple ProRes 422 HQ) |
| Tele camera sensor | 1/2-inch CMOS |
| Tele camera shutter speed | Electronic Shutter: 2-1/8000 s |
| Tele lens | FOV: 15° Format Equivalent: 162mm Aperture: f/4.4 Focus: 3 m to ∞ |
| Tele ISO range | Video: 100-6400 Still Image: 100-6400 |
| Tele video formats | MP4/MOV (MPEG-4 AVC/H.264, HEVC/H.265) |
| Tele video resolution | H264/H.265 4K: 3840×2160@30 fps FHD: 1920×1080@30 fps |
| Gimbal stabilization | 3-axis motorized (tilt, roll, pan) |
| Battery capacity | 5000 mAh |
| Weight | 335.5 g |
| Dimensions (Folded/unfolded) | Folded (without propellers) 221×96.3×90.3 mm (Length×Width×Height) Unfolded (without propellers) 347.5×283×107.7 mm (Length×Width×Height) |


